Unreal Engine 4 C++ Game-play Classes

Creating and implementing game-play classes

Unreal Engine use C++ for programming language so when we creating game-play C++ class in engine this is comprised in header file (.h) and a source file (.cpp).

Header file and Source file

  • Declarations of the class and its members like variables and functions
  • Where the functionality is defined by implementing the function that belong to the class or define in Header file.

Unreal engine uses standardized naming scheme so we find instantly what king of class it is. Looking on first letter of class or prefix;

PrefixMeaning
AActors and Spawned directly into wold
UAll game-play objects. These not directly instanced into the world, they belong from actor;
Generally objects like Components;

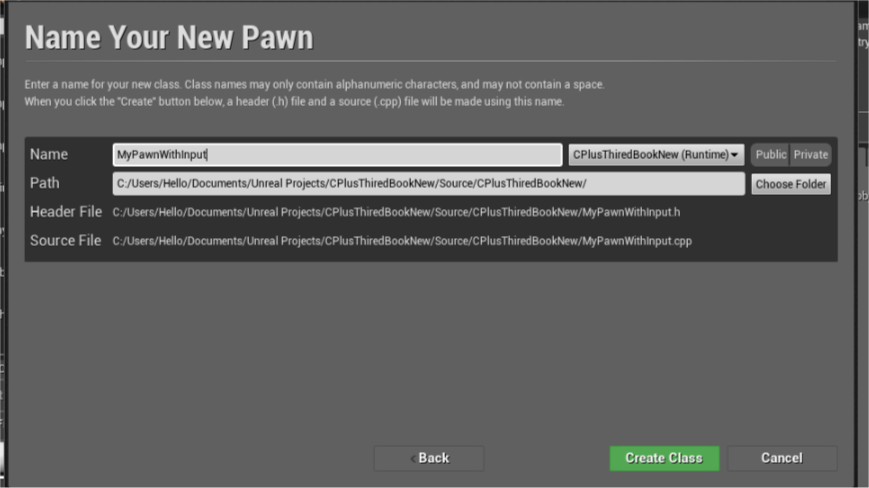
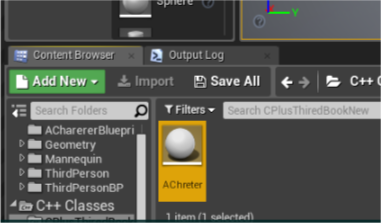
Create new c++ class and explore this;
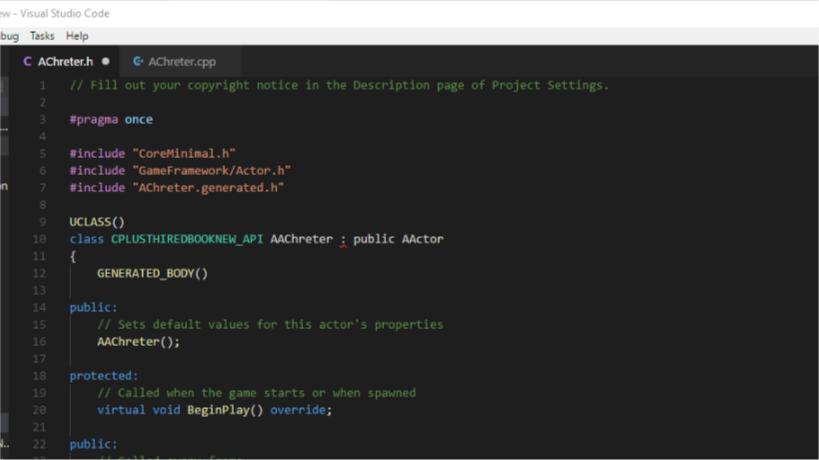
Class Headers

// Fill out your copyright notice in the Description page of Project Settings.

#pragma once

#include "CoreMinimal.h"
#include "GameFramework/Actor.h"
#include "ES_SpawanEnemy.generated.h"

UCLASS()
class COVERTRACK_API AES_SpawanEnemy : public AActor
{
	GENERATED_BODY()
	
public:	
	// Sets default values for this actor's properties
	AES_SpawanEnemy();

protected:
	// Called when the game starts or when spawned
	virtual void BeginPlay() override;

public:	
	// Called every frame
	virtual void Tick(float DeltaTime) override;

	UPROPERTY(EditAnywhere, Category = "Enemy Values")
		USceneComponent* SceneComponent;

	UPROPERTY(EditAnywhere, Category = "Enemy Values")
		UStaticMeshComponent* SpawanEnemyActor;

	
	UPROPERTY(EditAnywhere, Category = "TargetPoint")
		UParticleSystemComponent* TargetSpawaning;


};

Game-play classes generally have separated and unique class header files. These classes files matched what type class of you defined, with A or U prefix and using .h file Extension. In top of file game-play class is Actor and uses AES_SpawanEnemy prefix; Class header files for game-play use standard c++ syntax in conjunction with specialized macros to simplify the process of declaring classes, variables and functions.You can see the generated header file( automatically generated) include needs to be include.

Class Declaration

Defines the name of the class, what class inherit from and any functions and variables it inherits.

UCLASS([specifier, specifier, ...], [meta(key=value, key=value, ...)])
class ClassName : public ParentName
{
    GENERATED_BODY()
}

Standard C++ class declaration for the class. Described such as class specifiers and metadata are passed in UCLASS() macro, used for create UClass for the being declared, which can be thought of as the engine’s specialized representation of the class. GENERATED_BODY() must be placed at the very first of class body;

Class Specifiers

Abstract -> preventing the user from adding Actors of this class to level.

AdvancedClassDisplay -> forces all properties of the class to show only in advanced sections of any details panel where the appear;

AutoCollapseCategories=(Category1, Category2, …) -> Navigates the effects, for the listed categories of the AutoExpandCategories Specifier on a parent class.

AutoExpandCategories=(Category1, Category2, …) -> Specifiers one or more categories that should be automatically expanded in the unreal editor Property window.

Blueprintable -> Expose this class as an acceptable base class for creating Blueprints. Default is NotBlueprintable.

BlueprintType -> Expose this class as type that can be used for variables in Blueprints;

ClassGroup = GroupName -> Indicates that unreal Editor Actor Browser should include this class and any subclass of this class with Groupname. Group View is enabled in the Actor Browser.

CollapseCategories -> this class properties should not be grouped in categories in Unreal editor property window.

Config=ConfigName -> Allow that this class is allowed data in config file .ini.

Const -> All properties and function in this class are const and exported as const. This specifier is inherit by subclass.

More!!

Metadata Specifiers

Use : metadata specifiers differs between regular class, functions and interfaces.

BlueprintSpawnableComponent -> If present the Component class can be spawned by a Blueprint;

BlueprintThreadSafe -> Only valid blueprint function Lib. This specifier marks the functions in this class as callable on non-game threads in Animation Blueprints.

DisplayName=”Blueprint Node Name” -> The name of node in Blueprint will be replaced with the value;

ShortToolTip=”Short tooltip” -> short tool tip

More!!

Class Implementation

All game-play classes must use the GENERATED_BODY macro in order to be implemented properly.

The Source file [.cpp] must include Header File that contains the c plus declaration, and generated automatically.

Class Constructor

UObjects use Constructors to set default value for properties and other variables as well.


// Sets default values
AES_SpawanEnemy::AES_SpawanEnemy()
{}

Read from Official Docs

Blog System With Blogger API Integration (MEAN)

Blog System EXPRESS JavaScript and ANGULAR

Hello World, I made a Blog System Web Application for My Blogging but i don’t use this.
Why i don’t use i don’t know!!!

Technology (This project Made on Linux OS System )

  1. Angular (Fronted) 
  2. Node JavaScript (Express JavaScript Back-end  )
  3. MongoDB (Database)
File System :
Back-end -> server.js (this is server back-end file )
Project Learning -> Fronted Files 
  1. create-component
  2. BlogSystem28 minutes ago -> Create New Blog

  3.  edit-component
  4. BlogSystem28 minutes ago -> Edit Blog (No Source Code)

  5.  listcomponent
  6. BlogSystem28 minutes ago -> Showing All Blogs Lists

  7. post-view
  8. BlogSystem28 minutes ago -> Full Blog Post

  9. app-routing.module.ts
  10. BlogSystem28 minutes ago -> App Routes

  11. app.component.css
  12. BlogSystem28 minutes ago

  13. app.component.html
  14. BlogSystem28 minutes ago

  15. app.component.spec.ts
  16. BlogSystem28 minutes ago

  17. app.component.ts
  18. BlogSystem28 minutes ago

  19. app.module.ts
  20. BlogSystem28 minutes ago

  21. blogger.service.spec.ts
  22. BlogSystem28 minutes ago 

  23. blogger.service.ts
  24. BlogSystem28 minutes ago -> Blogger Service (If you want connect with Blogger API’s)

  25. highlight.service.spec.ts
  26. BlogSystem28 minutes ago

  27. highlight.service.ts
  28. BlogSystem28 minutes ago

  29. issue.model.ts
  30. BlogSystem28 minutes ago -> Issue model for DB 

  31. issue.service.spec.ts
  32. BlogSystem28 minutes ago

  33. issue.service.ts
  34. BlogSystem28 minutes ago -> Back-end Connect service with server.js  

  35. prism.css
  36. BlogSystem28 minutes ago

  37. prism.js
  38. BlogSystem28 minutes ago

Requirements:

  1. Node js -> 
  2. Angular CLI (Command Line Interface)
Download All Project From GitHub 
Make A Folder And Extract All And Back-end ZIP file
Now Install Node On Your System 
Go to ProjectLearing Folder:
Open Terminal Command 

sudo npm install -g @angular/cli


OK Angular Part is Ready 
Now Run The Angular Project 
Command:
ng serve
Home page Without back-end
Output Of Angular Web Application

Setup Back-end

Go To backend folder 
Open Terminal 
Command
npm start 
But Back-end need MongoDB install first 
Successfully setup 
install Robo3T 
This Project Using By default Port of MongoDB.
Open Robo3T
Make Database name It “firstdb “
Collection Name “issues” 

Robo3t
With Command Line :
Open Terminal 
 $ mongo
 $ use firstdb
You need a insert some data in firstdb with command line 

$ db.issues.insert ({ title: “This is My DB” }) // collection issues
$ show databases
or 
if not working run this 

db.createCollection(“issues”) 
Ok MongoDB is Ready 
Now Run the server.js
$ npm start
> nodemon server.js
[nodemon] 1.19.1
[nodemon] to restart at any time, enter `rs`
[nodemon] watching: *.*
[nodemon] starting `node server.js`
(node:10316) DeprecationWarning: current URL string parser is deprecated, and will be removed in a future version. To use the new parser, pass option { useNewUrlParser: true } to MongoClient.connect.
Express Server Is NOW ON
*******DB Now Connections ON********
output of server.js 
If we refresh the angular web application the don’t show anything 

This project uses NGINX reverse Proxy so you need to setup this first. If you are on Linux OS system already have nginx if not install it.

sudo apt update
sudo apt install nginx
sudo nano /etc/nginx/sites-available/default

  location / {
proxy_pass http://localhost:8080;
proxy_http_version 1.1;
proxy_set_header Upgrade $http_upgrade;
proxy_set_header Connection 'upgrade';
proxy_set_header Host $host;
proxy_cache_bypass $http_upgrade;
}
}
checking errors 
sudo nginx -t

run nginx service 
sudo systemctl restart nginx
Now refresh the page of Angular Web application 
home page with database setup
you don’t see this lists because you not insert data into Collection;
insert Into Robo3t -> firstdb->issues->insert document 

{
    “_id” : ObjectId(“5d2173891d52091fd62a5cbb”),
    “description” : “sd”,
    “status” : “Open”,
    “title” : “Hello Wrold”,
    “responsebile” : “No Resposiable”,
    “severity” : “sdf”,
    “__v” : 0
}
Create New Post Button 
open file ->  templateUrl: ‘./listcomponent.component.html’,
enter following code 
<button mat-fab [routerLink]=“[‘/create’]”
routerLinkActive=“router-link-active” >New Post </button>
Full Post View 
full post preview
Create Page View 
Post creating Page
Yes this Disabled File Upload (Enable Back-end code and Services  )and Blogger Integration (Need API key And Blogger ID) you need to  enable it!!!  

Unreal-Engine-C-Programming – Components and Collision -part-6/10

Create Components;

  1. Make a Pawn Class 
  2. Name it what you want
  3. We make a components move and collide with solid objects;

Creating Properties

  • Colide_Pawn.h 
UParticleSystemComponent* OurParticalSystem;
  • Colide_Pawn.cpp in Constructor we create :
  • Sphere Component 
  • Static Mesh Component
  • Spring Arm Component 
  • Camera Component  

We need Import Files first :

#include “Classes/Components/SphereComponent.h”
#include “Classes/Components/StaticMeshComponent.h”
#include “ConstructorHelpers.h”
#include “Classes/Particles/ParticleSystemComponent.h”
#include “GameFramework/SpringArmComponent.h”
#include “Camera/CameraComponent.h”                          

we will define first Root Component :

   Physical Presence that interact and collide with our game world.
USphereComponent* SphereComponent = CreateDefaultSubobject
(TEXT(“SPEHERE”));
    RootComponent = SphereComponent;
    SphereComponent->InitSphereRadius(40.0f);
    SphereComponent->SetCollisionProfileName(TEXT(“Pawn”));

Next we create Static Mesh asset :

UStaticMeshComponent* SphereVisual = CreateDefaultSubobject<UStaticMeshComponent>
(TEXT(“Mesh”));
    SphereVisual->SetupAttachment(RootComponent);
    static ConstructorHelpers::FObjectFinder SphereVisualAsset(TEXT
(“/Game/StarterContent/Shapes/Shape_Sphere.Shape_Sphere”));

    if (SphereVisualAsset.Succeeded())
    {
        SphereVisual->SetStaticMesh(SphereVisualAsset.Object);
        SphereVisual->SetRelativeLocation(FVector(0.0f, 0.0f, –40.0f));
        SphereVisual->SetWorldScale3D(FVector(0.8f));
    }

Next Create our particle System Component :

    Attach with Static Mesh Component, not the root;
// Create paritcal system;
    OurParticalSystem = CreateDefaultSubobject
(TEXT(“Paritcal”));
    OurParticalSystem->SetupAttachment(SphereVisual);
    OurParticalSystem->bAutoActivate = false;
    OurParticalSystem->SetRelativeLocation(FVector(-20.0f, 0.0f, 20.0f));

    static ConstructorHelpers::FObjectFinder ParticleAsset
(TEXT(“/Game/StarterContent/Particles/P_Fire.P_Fire”));
    if (ParticleAsset.Succeeded())
    {
        OurParticalSystem->SetTemplate(ParticleAsset.Object);
    }
Next we Will want to Spring Arm Component for camera smooth : 
  Attach with camera;
  Camera speed accelerate and decelerate more slowly;
// Use a spring arm to give the camera smooth, natural-feeling motion;
    USpringArmComponent* SpringArm = CreateDefaultSubobject
(TEXT(“Spring ARM”));
    SpringArm->SetupAttachment(RootComponent);
    SpringArm->RelativeRotation = FRotator(-45.0f, 0.0f, 0.0f);
    SpringArm->TargetArmLength = 400.0f;
    SpringArm->bEnableCameraLag = true;
    SpringArm->CameraLagSpeed = 3.0f;

Camera Component  :

    UCameraComponent* Camera = CreateDefaultSubobject
(TEXT(“Camera”));
    Camera->SetupAttachment(SpringArm, USpringArmComponent::SocketName);
Set the default pawn player;
// Take control of the defalut palyer;
    AutoPossessPlayer = EAutoReceiveInput::Player0;
now we create basics components:
the code is here;
// Sets default values
AColli_Pawn::AColli_Pawn()
{
   // Set this pawn to call Tick() every frame. You can turn this off to improve
performance if you don’t need it.
    PrimaryActorTick.bCanEverTick = true;

    // Our Root component will be a sphere that reacts to physics;
    USphereComponent* SphereComponent = CreateDefaultSubobject
(TEXT(“SPEHERE”));
    RootComponent = SphereComponent;
    SphereComponent->InitSphereRadius(40.0f);
    SphereComponent->SetCollisionProfileName(TEXT(“Pawn”));

    UStaticMeshComponent* SphereVisual = CreateDefaultSubobject
(TEXT(“Mesh”));
    SphereVisual->SetupAttachment(RootComponent);
    static ConstructorHelpers::FObjectFinder SphereVisualAsset
(TEXT(“/Game/StarterContent/Shapes/Shape_Sphere.Shape_Sphere”));

    if (SphereVisualAsset.Succeeded())
    {
        SphereVisual->SetStaticMesh(SphereVisualAsset.Object);
        SphereVisual->SetRelativeLocation(FVector(0.0f, 0.0f, –40.0f));
        SphereVisual->SetWorldScale3D(FVector(0.8f));
    }

    // Create paritcal system;
    OurParticalSystem = CreateDefaultSubobject
(TEXT(“Paritcal”));
    OurParticalSystem->SetupAttachment(SphereVisual);
    OurParticalSystem->bAutoActivate = false;
    OurParticalSystem->SetRelativeLocation(FVector(-20.0f, 0.0f, 20.0f));

    static ConstructorHelpers::FObjectFinder ParticleAsset
(TEXT(“/Game/StarterContent/Particles/P_Fire.P_Fire”));
    if (ParticleAsset.Succeeded())
    {
        OurParticalSystem->SetTemplate(ParticleAsset.Object);
    }

    // Use a spring arm to give the camera smooth, natural-feeling motion;
    USpringArmComponent* SpringArm = CreateDefaultSubobject
(TEXT(“Spring ARM”));
    SpringArm->SetupAttachment(RootComponent);
    SpringArm->RelativeRotation = FRotator(-45.0f, 0.0f, 0.0f);
    SpringArm->TargetArmLength = 400.0f;
    SpringArm->bEnableCameraLag = true;
    SpringArm->CameraLagSpeed = 3.0f;

    //Camera and attach to our spring arm;
    UCameraComponent* Camera = CreateDefaultSubobject
(TEXT(“Camera”));
    Camera->SetupAttachment(SpringArm, USpringArmComponent::SocketName);

    // Take control of the defalut palyer;
    AutoPossessPlayer = EAutoReceiveInput::Player0;

    // Our Custom Movement Component Class;
    OurMovementComponent = CreateDefaultSubobject
(TEXT(“MovementCustome”));
    OurMovementComponent->UpdatedComponent = RootComponent;
}

We On now Input Part :

  1. Go to Edit > Project Settings > Input 
  2. We have to options Action Mapping and Axis Mapping
  3. Action Mapping > Particle Toggle : Space Bar
  4. Axis Mapping
    MoveForward
    W
    1.0
    S
    -1.0
    MoveRight
    A
    -1.0
    D
    1.0
    Turn
    Mouse X
    1.0

  1. Now we want create Movement in our Pawn class;
  2. Create Movement Component to mange all movement Input’s;
  3. Extend Pawn Movement Component 
  4. check all classes search movement we found Pawn Movement Component;

Pawn movement component have some powerful, built-in features;

help to common physics functionality and more helpful movement code;

Since we call the class name CollidePawnMovement.h or cpp ;

Code Movement And Pawn;

  1. Use our CollidePawnMovement.h make a function;

             TickComponent function how to move each frame.

public:
// this function define in .h file;
    virtual void TickComponent(float DeltaTime,
enum ELevelTick TickType,
FActorComponentTickFunction* ThisTickFunction ) override;
  1. Define in .cpp class of CollidePawnMovement;
if (!PawnOwner || !UpdatedComponent || ShouldSkipUpdate(DeltaTime))
    {
        return;
    }
            This code will move our Pawn smoothly around the world; There is no gravity;

void UColidePawnMovementComponent::TickComponent(float DeltaTime,
enum ELevelTick TickType, FActorComponentTickFunction *ThisTickFunction) {

    Super::TickComponent(DeltaTime, TickType, ThisTickFunction);

    // Make sure that everything is still valid and that we are allowed
    if (!PawnOwner || !UpdatedComponent || ShouldSkipUpdate(DeltaTime))
    {
        return;
    }

    // Get and than clear the movement vector that we set in ACollideingPawn::TIck;
    FVector DesiredMovementThisFrame = ConsumeInputVector().
GetClampedToMaxSize(1.0f)* DeltaTime * 150.0f;
    if (!DesiredMovementThisFrame.IsNearlyZero())
    {
        FHitResult Hit;
        SafeMoveUpdatedComponent(DesiredMovementThisFrame,
UpdatedComponent->GetComponentRotation(), true, Hit);

        //if we bumped into something, try to slide along it;
        if (Hit.IsValidBlockingHit())
        {
            SlideAlongSurface(DesiredMovementThisFrame, 1.0f – Hit.Time,
Hit.Normal, Hit);
        }
    }
}
TickComponent:: 
                        This function makes use of a few of the powerful features;
                         UPawnMovementComponent class ConsumeInputVector  clear the value of built-in
                         variable that use in our movement inputs;
                         SafeMoveUpdatedComponent uses Unreal Engine Physics to move our Pawn                                       Movement Component;
                        SlideAlongSurface handles the calculations and physics involved with sliding                                    smoothly.  

Pawn And Components:

  1. Add the class in Collide_Pawn.h with “OurParticleSystem”:
    class UColidePawnMovementComponent* OurMovementComponent;
  1. Now Include the class in .cpp file of Collide_Pawn;
#include “ColidePawnMovementComponent.h”
  1. Create a Pawn Movement Component in .cpp file of Collide_Pawn.cpp ;
OurMovementComponent = CreateDefaultSubobject
(TEXT(“MovementCustome”));
    OurMovementComponent->UpdatedComponent = RootComponent;
  1. Pawns have a function called GetMovementComponent that enable other classes in the engine;
    virtual UPawnMovementComponent* GetMovementComponent() const override;
  1. In Collide_Pawn.cpp add the GetMovementComponent() funciton;
UPawnMovementComponent* AColli_Pawn::GetMovementComponent() const {
    return OurMovementComponent;
}
  • Create Pawn Movement Component set up;
  • In Collide_Pawn.h 
// Made Input Functionsa
    void MoveForwardw(float AxisValue);
    void MoveRightw(float AxisValue);
    void Turnw(float AxisValue);
    void ParticleTogglew();
  • In Collide_Pawn.cpp;
void AColli_Pawn::MoveRightw(float AxisValue)
{
    if (OurMovementComponent && (OurMovementComponent->UpdatedComponent ==
RootComponent))
    {
        OurMovementComponent->AddInputVector(GetActorRightVector() * AxisValue);

    }
}

void AColli_Pawn::Turnw(float AxisValue)
{
    FRotator NewRotation = GetActorRotation();
    NewRotation.Yaw += AxisValue;
    SetActorRotation(NewRotation);
}

void AColli_Pawn::ParticleTogglew()
{
    if (OurParticalSystem && OurParticalSystem->Template)
    {
        OurParticalSystem->ToggleActive();
    }
}
  • Our inputs events in SetupPlayerInputComponent();
// Called to bind functionality to input
void AColli_Pawn::SetupPlayerInputComponent(UInputComponent* PlayerInputComponent)
{
    Super::SetupPlayerInputComponent(PlayerInputComponent);

    PlayerInputComponent->BindAction(“ParticleToggle”, IE_Pressed, this,
&AColli_Pawn::ParticleTogglew);

    PlayerInputComponent->BindAxis(“MoveForward”, this, &AColli_Pawn::MoveForwardw);
    PlayerInputComponent->BindAxis(“MoveRight”, this, &AColli_Pawn::MoveRightw);
    PlayerInputComponent->BindAxis(“Turn”, this, &AColli_Pawn::Turnw);
}
All Code Files ::
Colli_Pawn.h
// Fill out your copyright notice in the Description page of Project Settings.

#pragma once

#include “CoreMinimal.h”
#include “GameFramework/Pawn.h”
#include “Colli_Pawn.generated.h”

UCLASS()
class CPLUSPROGRAMMING_API AColli_Pawn : public APawn
{
    GENERATED_BODY()

public:
    // Sets default values for this pawn’s properties
    AColli_Pawn();

protected:
    // Called when the game starts or when spawned
    virtual void BeginPlay() override;

public: 
    // Called every frame
    virtual void Tick(float DeltaTime) override;

    // Called to bind functionality to input
    virtual void SetupPlayerInputComponent
(class UInputComponent* PlayerInputComponent) override;

    UParticleSystemComponent* OurParticalSystem;
    virtual UPawnMovementComponent* GetMovementComponent() const override;
    class UColidePawnMovementComponent* OurMovementComponent;

    // Made Input Functionsa
    void MoveForwardw(float AxisValue);
    void MoveRightw(float AxisValue);
    void Turnw(float AxisValue);
    void ParticleTogglew();
};
Colli_Pawn.cpp
// Fill out your copyright notice in the Description page of Project Settings.

#include “Colli_Pawn.h”
#include “Classes/Components/SphereComponent.h”
#include “Classes/Components/StaticMeshComponent.h”
#include “ConstructorHelpers.h”
#include “Classes/Particles/ParticleSystemComponent.h”
#include “GameFramework/SpringArmComponent.h”
#include “Camera/CameraComponent.h”
#include “ColidePawnMovementComponent.h”
#include “Classes/Components/InputComponent.h”
// Sets default values
AColli_Pawn::AColli_Pawn()
{
   // Set this pawn to call Tick() every frame. You can turn this off to
improve performance if you don’t need it.
    PrimaryActorTick.bCanEverTick = true;

    // Our Root component will be a sphere that reacts to physics;
    USphereComponent* SphereComponent = CreateDefaultSubobject
(TEXT(“SPEHERE”));
    RootComponent = SphereComponent;
    SphereComponent->InitSphereRadius(40.0f);
    SphereComponent->SetCollisionProfileName(TEXT(“Pawn”));

    UStaticMeshComponent* SphereVisual = CreateDefaultSubobject
(TEXT(“Mesh”));
    SphereVisual->SetupAttachment(RootComponent);
    static ConstructorHelpers::FObjectFinder SphereVisualAsset
(TEXT(“/Game/StarterContent/Shapes/Shape_Sphere.Shape_Sphere”));

    if (SphereVisualAsset.Succeeded())
    {
        SphereVisual->SetStaticMesh(SphereVisualAsset.Object);
        SphereVisual->SetRelativeLocation(FVector(0.0f, 0.0f, –40.0f));
        SphereVisual->SetWorldScale3D(FVector(0.8f));
    }

    // Create paritcal system;
    OurParticalSystem = CreateDefaultSubobject
(TEXT(“Paritcal”));
    OurParticalSystem->SetupAttachment(SphereVisual);
    OurParticalSystem->bAutoActivate = false;
    OurParticalSystem->SetRelativeLocation(FVector(-20.0f, 0.0f, 20.0f));

    static ConstructorHelpers::FObjectFinder ParticleAsset
(TEXT(“/Game/StarterContent/Particles/P_Fire.P_Fire”));
    if (ParticleAsset.Succeeded())
    {
        OurParticalSystem->SetTemplate(ParticleAsset.Object);
    }

    // Use a spring arm to give the camera smooth, natural-feeling motion;
    USpringArmComponent* SpringArm = CreateDefaultSubobject
(TEXT(“Spring ARM”));
    SpringArm->SetupAttachment(RootComponent);
    SpringArm->RelativeRotation = FRotator(-45.0f, 0.0f, 0.0f);
    SpringArm->TargetArmLength = 400.0f;
    SpringArm->bEnableCameraLag = true;
    SpringArm->CameraLagSpeed = 3.0f;

    //Camera and attach to our spring arm;
    UCameraComponent* Camera = CreateDefaultSubobject
(TEXT(“Camera”));
    Camera->SetupAttachment(SpringArm, USpringArmComponent::SocketName);

    // Take control of the defalut palyer;
    AutoPossessPlayer = EAutoReceiveInput::Player0;

    // Our Custom Movement Component Class;
    OurMovementComponent = CreateDefaultSubobject
(TEXT(“MovementCustome”));
    OurMovementComponent->UpdatedComponent = RootComponent;
}

// Called when the game starts or when spawned
void AColli_Pawn::BeginPlay()
{
    Super::BeginPlay();
    
}

// Called every frame
void AColli_Pawn::Tick(float DeltaTime)
{
    Super::Tick(DeltaTime);

}

// Called to bind functionality to input
void AColli_Pawn::SetupPlayerInputComponent(UInputComponent* PlayerInputComponent)
{
    Super::SetupPlayerInputComponent(PlayerInputComponent);

    PlayerInputComponent->BindAction(“ParticleToggle”, IE_Pressed, this,
&AColli_Pawn::ParticleTogglew);

    PlayerInputComponent->BindAxis(“MoveForward”, this, &AColli_Pawn::MoveForwardw);
    PlayerInputComponent->BindAxis(“MoveRight”, this, &AColli_Pawn::MoveRightw);
    PlayerInputComponent->BindAxis(“Turn”, this, &AColli_Pawn::Turnw);
}

// UPawn Movement Component;
UPawnMovementComponent* AColli_Pawn::GetMovementComponent() const {
    return OurMovementComponent;
}

void AColli_Pawn::MoveForwardw(float AxisValue)
{
    if (OurMovementComponent && (OurMovementComponent->UpdatedComponent ==
RootComponent))
    {
        OurMovementComponent->AddInputVector(GetActorForwardVector() * AxisValue);

    }
}

void AColli_Pawn::MoveRightw(float AxisValue)
{
    if (OurMovementComponent && (OurMovementComponent->UpdatedComponent ==
RootComponent))
    {
        OurMovementComponent->AddInputVector(GetActorRightVector() * AxisValue);

    }
}

void AColli_Pawn::Turnw(float AxisValue)
{
    FRotator NewRotation = GetActorRotation();
    NewRotation.Yaw += AxisValue;
    SetActorRotation(NewRotation);
}

void AColli_Pawn::ParticleTogglew()
{
    if (OurParticalSystem && OurParticalSystem->Template)
    {
        OurParticalSystem->ToggleActive();
    }
}

Unreal-Engine-C-Programming-Pawan And Input-Getting-With-part-5/10

First We Make Pawn Class
Pawn means Actor this controlled by Input with Humans or AI
Second Select Pawn
Create!
Open Header file

UPROPERTY(EditAnywhere)
        USceneComponent* OurVisibleComponent;
Goes to cpp file

Include files

#include “Components/StaticMeshComponent.h”
#include “Components/InputComponent.h”
AutoPossessPlayer = EAutoReceiveInput::Player0;
Setup this code

AMyPawnWithInput::AMyPawnWithInput()
{
   // Set this pawn to call Tick() every frame. You can turn this 
//off to improve performance if you don’t need it.
    PrimaryActorTick.bCanEverTick = true;
    AutoPossessPlayer = EAutoReceiveInput::Player0;
    RootComponent = CreateDefaultSubobject<USceneComponent>(TEXT(“RootComponent”));
    // Create a camera and a visible object
    UCameraComponent* OurCamera = CreateDefaultSubobject<UCameraComponent> 
(TEXT(“OurCamera”));

    OurVisibleComponent = CreateDefaultSubobject<UStaticMeshComponent> 
(TEXT(“OurVisibleComponent”));
    // Attach our camera and visible object to our root component. 
//Offset and rotate the camera.
    OurCamera->SetupAttachment(RootComponent);
    OurCamera->SetRelativeLocation(FVector(250.0f, 0.0f, 250.0f));
    OurCamera->SetRelativeRotation(FRotator(45.0f, 0.0f, 0.0f));
    OurVisibleComponent->SetupAttachment(RootComponent);
}
Compile!!

Goes to Edit -> Project Setting find Input
Click on Input Find Axis Bind and Action Bind
Axis Bind – MoveForward (W(1.0),S(-1.0)) and MoveRight(A(-1.0),D(1.0))
Action Bind – Jump (SpaceBar)

Header file

    bool gGrooing;
    void MoveForward(float Axis);
    void MoveRight(float Axis);
    void JumpStart();
    void JumpStop();
    //Input Variables
    FVector CurrentVelocity;
Cpp file 
 First

void AMyPawnWithInput::MoveForward(float Axis) {
    CurrentVelocity.X = FMath::Clamp(Axis, 1.0f, 1.0f) * 100.0f ;
}
void AMyPawnWithInput::MoveRight(float Axis) {
    CurrentVelocity.Y = FMath::Clamp(Axis, 1.0f, 1.0f) * 100.0f;
}

void AMyPawnWithInput::JumpStart() {
    gGrooing = true;
}

void AMyPawnWithInput::JumpStop() {
    gGrooing = false;
}
Second
void AMyPawnWithInput::SetupPlayerInputComponent(UInputComponent* PlayerInputComponent)
{
    Super::SetupPlayerInputComponent(PlayerInputComponent);

    PlayerInputComponent->BindAction(“Jump”, IE_Pressed, this, &AMyPawnWithInput::JumpStart);
    PlayerInputComponent->BindAction(“Jump”, IE_Released, this, &AMyPawnWithInput::JumpStop);

    PlayerInputComponent->BindAxis(“MoveForward”, this, &AMyPawnWithInput::MoveForward);
    PlayerInputComponent->BindAxis(“MoveRight”, this, &AMyPawnWithInput::MoveRight);

}
Ok Goes Tick();

// Called every frame
void AMyPawnWithInput::Tick(float DeltaTime)
{
    Super::Tick(DeltaTime);
        
    float CurrentScale = OurVisibleComponent->GetComponentScale().X;

    if (gGrooing) {
        CurrentScale += DeltaTime;
    }
    else {
        CurrentScale -= DeltaTime;
    }

    if (!CurrentVelocity.IsZero()) {
        FVector NewLocation = GetActorLocation() + (CurrentVelocity * DeltaTime );
        SetActorLocation(NewLocation);
    }

}
Compile And Play!!

Unreal-Engine-C-Programming-Camera-Change-Getting-With-part-4-10

Camera Change

  •  Create Two Cameras with two methods Go to Modes and Select Basics Classes cheke this
    First Camera


    Second Method – Modes – Basics – Cube – Select Cube – Click On Add Component – Camera (rename this)

    Second Camera adding with Cube

    Now Create class Open Your IDE write code
    In Header file 

    UPROPERTY (EditAnywhere)   
    AActor* OneCamer;
    UPROPERTY (EditAnywhere)   
    AActor* CamerTwo;
    float NextTimeCamerChange;

 In cpp file 
first Include 

#include “Kismet/GameplayStatics.h”

void ACamerChange::Tick(float DeltaTime)
{
Super::Tick(DeltaTime);
    const float TimeBetweenCarmerchange = 2.0f;
    const float SmoothBlenTime          = 0.76f;
                NextTimeCamerChange -= DeltaTime;
    if (NextTimeCamerChange <= 0.0f)
    {
        NextTimeCamerChange += TimeBetweenCarmerchange;
        APlayerController * OurPlayerController = 
 UGameplayStatics::GetPlayerController(this,0);
        if( OurPlayerController ){
            if( (OurPlayerController->GetViewTarget() != OneCamer ) && 
(OneCamer != nullptr) ){
         OurPlayerController->SetViewTarget(OneCamer);
         }
           else if ((OurPlayerController->GetViewTarget() != CamerTwo ) && 
(CamerTwo != nullptr))
   {
                OurPlayerController->SetViewTargetWithBlend(CamerTwo , SmoothBlenTime);
            }
        }
    }
}

 Compile 
And class file drag file in level editor find Change Camera Properties 
check it 

Add file into level editor select file and fill properties

 Final Code Here
Code Download

Unreal Engine C++ Programming |Transforms & Mesh| Getting With part-3/10

Transform

1.Open Class which you make part-1 and part-2
2.Open class header file and

//Transforms
UPROPERTY (EditAnywhere)
   AActor* player; 

Compile code
compile
Now Property show on Details panel
Add player


 Set player
 Now write some code for player when go to actor or object get location.
float dist = this->GetDistanceTo(player);      
 Now again go to header file declare property

private:
FVector mCurrentLocation;
 FVector = location (X Y Z)
Now Complete the code 
AAChreter::AAChreter()
{
   // Set this actor to call Tick() every frame. 
  //You can turn this off to improve performance if you don’t need it.
    PrimaryActorTick.bCanEverTick = true;
Root = CreateDefaultSubobject <USceneComponent > (TEXT (“Root”));
RootComponent = Root;
Mesh = CreateDefaultSubobject <UStaticMeshComponent >(TEXT (“Mesh”));
Mesh -> AttachTo(Root);

}

// Called when the game starts or when spawned
void AAChreter::BeginPlay()
{
    Super::BeginPlay();
    mCurrentLocation = Mesh->GetRelativeTransform().GetLocation();
    
}

// Called every frame
void AAChreter::Tick(float DeltaTime)
{
    Super::Tick(DeltaTime);
    float dist = this->GetDistanceTo(player);       
    FVector distA = mCurrentLocation;
    if (dist < 250){
        distA.Z += 80;
    }
    Mesh->SetRelativeLocation(distA);
}
Now Compile!
 Actor can be moveable if not compiler show error when you close the game.

 Change the Object location on flower

 Run Game

Full Code On GitHub -> Transforms & Mesh

Unreal Engine C++ Programming |Static Mesh| Getting With part-2/10

Create Static Mesh

First Open C++ Class in IDE

Open C++ Class double click

2.Open header file
  Code :

#pragma once

#include “CoreMinimal.h”
#include “GameFramework/Actor.h”
#include “AChreter.generated.h”

UCLASS()
class CPLUSTHIREDBOOKNEW_API AAChreter : public AActor
{
    GENERATED_BODY()
    
public: 
    // Sets default values for this actor’s properties
    AAChreter();

protected:
    // Called when the game starts or when spawned
    virtual void BeginPlay() override;

public: 
    // Called every frame
    virtual void Tick(float DeltaTime) override;

    
UPROPERTY(EditAnywhere)
USceneComponent * Root;
UPROPERTY(EditAnywhere)
UStaticMeshComponent * Mesh;
    
};

Header file

Go To .cpp file
define in Set in  AMyActor::AMyActor()
Code :

#include “Components/StaticMeshComponent.h”

// Fill out your copyright notice in the Description page of Project Settings.

#include “AChreter.h”
#include “Components/StaticMeshComponent.h”

// Sets default values
AAChreter::AAChreter()
{
   // Set this actor to call Tick() every frame. 
//You can turn this off to improve performance if you don’t need it.
    PrimaryActorTick.bCanEverTick = true;
Root = CreateDefaultSubobject <USceneComponent > (TEXT (“Root”));

RootComponent = Root;
Mesh = CreateDefaultSubobject <UStaticMeshComponent >(TEXT (“Mesh”));

Mesh -> AttachTo(Root);

}

// Called when the game starts or when spawned
void AAChreter::BeginPlay()
{
    Super::BeginPlay();
    
}

// Called every frame
void AAChreter::Tick(float DeltaTime)
{
    Super::Tick(DeltaTime);

}

.cpp file for define logic

Compile! 

Check Your Details panel set Mesh and Actor (drag and drop class file in level and select this) now details panel show this file details.


Unreal Engine C++ Programming Getting With part-1/10


Create C++ Class In Unreal Engine 4.18 

1.Make A new Project With New C++ Project

2.Create New C++ class in Editor .


3.Select Actor.

Change


4.Open your code editor.
Click On Edit Preferences

Add Your Editor

Check Your class code (Visual Studio Code)

Unreal Engine 4.18 C++ Basics Class Definition Part-2


Class File and Header File Introduction 

Class file generate the files open in your IDE so you can editing it.
Code:::
#include “GameFramework/Actor.h”
#include “MyActor.generated.h”
UCLASS()
class AMyActor : public AActor
{
    GENERATED_BODY()
public:
    // Sets default values for this actor’s properties
    AMyActor();
    // Called every frame
    virtual void Tick( float DeltaSeconds ) override;
protected:
    // Called when the game starts or when spawned
    virtual void BeginPlay() override;
};
Class constructor below contains the line..
AMyActor::AMyActor()
 
{
 
    // Set this actor to call Tick() every frame.  You can turn this off to improve performance if you do not need it.
 
    PrimaryActorTick.bCanEverTick = true;
 
}
Making a property show up in the Unreal Engine Editor
     Class created so let’s make some property and showing on editor.
Special Marco Of Unreal Engine called it.
UPROPERTY(). 
All you have to do is use the
UPROPERTY(EditAnywhere) maro.
-> MyActor.h (in Your header file)
UCLASS()
class AMyActor : public AActor
{
    GENERATED_BODY()
public:
 
    UPROPERTY(EditAnywhere)
    int32 TotalDamage;
 
    ...
};
Passing more information::
UPROPERTY(EditAnywhere, Category="Damage")
                       //Damage is heading marked with category name
int32 TotalDamage; //total damage variable..
Now add property for to Blueprint::
BlueprintReadOnly for const (fix value or do not change the value const float pi = 3.14f )  in Blueprint.
UPROPERTY(EditAnywhere, BlueprintReadWrite, Category="Damage")
int32 TotalDamage;
Let’s add Code::
UCLASS()
class AMyActor : public AActor
{
    GENERATED_BODY()
public:
 
    UPROPERTY(EditAnywhere, BlueprintReadWrite, Category="Damage")
    int32 TotalDamage;
 
    UPROPERTY(EditAnywhere, BlueprintReadWrite, Category="Damage")
    float DamageTimeInSeconds;
 
    UPROPERTY(BlueprintReadOnly, VisibleAnywhere, Transient, Category="Damage")
    float DamagePerSecond;
 
    ...
};
 
DamageTimeInSeconds Only is property the designers can modify.
DamagePerSecond property is a calculated value using the designers setting.
VisibleAnywhere flag marks propery as viewable. Not Editable in Editor.
 
You can see this in Editor.

 
Add Default Values in constructor
Setting up default values in constructor works with same as your typical C++ class.
 
Note -> this  define in  AMyActor.cpp file
 
AMyActor::AMyActor()
{
    TotalDamage = 200; // in header file define
    DamageTimeInSeconds = 1.f; // in header file define
}
 
AMyActor::AMyActor() :
    TotalDamage(200),
    DamageTimeInSeconds(1.f)
{
}
Default values in Editor :

 
Set values by hooking into the PostInitProperties() call chin.
 
If default value gives by designer this working with our gives values.
Else engine automatically set that property values zero or nullptr in      this case.
 
void AMyActor::PostInitProperties()
{
    Super::PostInitProperties();
    DamagePerSecond = TotalDamage / DamageTimeInSeconds;
}
We change the vales in editor Damage Per Second is changed.


Unreal Engine 4.18 C++ Let’s Started

Unreal Engine C++


Unreal engine is awesome Game Engine for Game Developers. Unreal most important its development tools with great power.
Unreal Engine 4 Virtual Scripting call Blueprint for designer’s And C++ programming Language for Programmers this most important feature of this engine. 
Why Unreal Engine C++?
C++ is most important language for high performances for Big Games, memory storage etc. and more. C++ have more capabilities.  Unreal Engine develop own classes in easier way.
Class with Unreal Engine C++ Introduction   
First we create a class New C++ Class Unreal engine.
Create new Actor class.

Second step is Name of Your class.

And click on Create class
Class generates your class with BeginPlay()and Tick() specify as overloads.
BeginPlay()– is an event that let’s know the actor has entered the game in a playable state. This good place to initiate gameplay logic for your class.
This call when game is first run.
Tick()-            is called once per frame with the amount of elapsed time since the last call passed in. you can do recurring logic.
Call every frame per second.
Design a site like this with WordPress.com
Get started